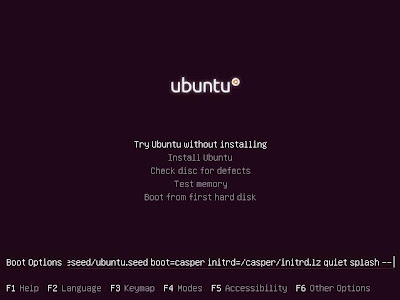
Comparing to previous releases of Ubuntu an impressive progress has been done on the version 10.04, all the hardware (except the sound card) was recognized after the installation and I only added some plugging to create a better feel-looking.
A. Installing the sound card
To make our sound card works we need to upgrade the Alsa driver from 1.0.21 to 1.0.23 (you can check your current version with the command cat /proc/asound/version)
You can find below the set of commands that you need to enter in order to perform the mentioned update (This tutorial is inspired in the following blog: http://monespaceperso.org/blog-en/2010/05/02/upgrade-alsa-1-0-23-on-ubuntu-lucid-lynx-10-04/):
1. Stop the current Alsa service:
sudo /sbin/alsa-utils stop
2. Install the needed tools to compile and run the further binary packages
sudo apt-get -y install build-essential ncurses-dev gettext xmlto libasound2-dev
sudo apt-get -y install linux-headers-`uname -r` libncursesw5-dev
3. Download the source code of the last Alsa version
cd ~
rm -rf ~/alsa* ~/.pulse*
wget ftp://ftp.alsa-project.org/pub/driver/alsa-driver-1.0.23.tar.bz2
wget ftp://ftp.alsa-project.org/pub/lib/alsa-lib-1.0.23.tar.bz2
wget ftp://ftp.alsa-project.org/pub/utils/alsa-utils-1.0.23.tar.bz2
4. Create a new folder for the compilation and installation of the previous files
sudo rm -rf /usr/src/alsa
sudo mkdir -p /usr/src/alsa
cd /usr/src/alsa
sudo cp ~/alsa* .
5. Unpack the .tar files
sudo tar xjf alsa-driver*
sudo tar xjf alsa-lib*
sudo tar xjf alsa-utils*
6. Compile and install alsa-driver
cd alsa-driver*
sudo ./configure
sudo make
sudo make install
7. Compile and install alsa-lib
cd ../alsa-lib*
sudo ./configure
sudo make
sudo make install
8. Compile and install alsa-utils
cd ../alsa-utils*
sudo ./configure
sudo make
sudo make install
9. Remove the 3 tar files in our personal folder
rm -f ~/alsa-driver*
rm -f ~/alsa-lib*
rm -f ~/alsa-utils*
10. Reboot your computer
B. Installing the printer Drivers
A good work has been done regarding the integration of HP printers in Ubuntu. If you are lucky and decided to bought a HP Deskjet F4500 Series, the only thing you need to install are the following packages:
hplip
hplip-gui
To do that I highly recommend to use the Synaptic Package Manager. (This tutorial is based on the following blog: http://www.issux.com/2010/06/27/configurar-impresora-hp-en-ubuntu/ )
After installation you can access to the HPLIP Toolbox (System → Preferences → HPLIP Toolbox) and add a new printer, following the detailed steps (See Fig.1)
Fig.1 Adding a new printer from HPLIP Toolbox
C. Installing Cairo Dock
Cairo dock is a Apple-like-dock available for Ubuntu. The only thing you need to do is to download and install the following packages:
cairo-dock
cairo-dock-plug-ins
After installation you can run it from Applications → Accessories → GLX-Dock (This one with OpenGL enabled is much more funny)
D. Installing Compiz
By installing the whole Compiz package you will be able to enjoy a lot of desktop graphic effects like 3D cube and much more. To do that you only need to install the following packages:
compizconfig-settings-manager
compiz-fusion-plugins-extra
After doing that you can access to the Compiz configuration manager (System → Preferences → CompizConfig Settings Manager) and include the effects wished (You can enable the 3D Cube under the “Desktop” tab).
APENDIX
Here I will leave some useful and tested links if you want to install and configure Debian (Squeeze) on the machine:
*****Wireless*****
http://wiki.debian.org/wl
647970686F676862616E6E6174
*****Sound Card*****
http://www.esdebian.org/wiki/intel-corporation-5-series3400-series-chipset-high-definition-audio-rev-05
*****Touch Pad*****
Config on System/Preferences/Mouse
*****HDMI*****
https://wiki.archlinux.org/index.php/Advanced_Linux_Sound_Architecture#Using_udev_to_automatically_turn_HDMI_audio_on_or_off
aplay -l
/etc/alsa/hdmi-switch
*****Chrome*****
dpkg -i google google-chrome-stable_current_i386.deb
cp /opt/google/chrome/google-chrome.desktop /usr/share/applications
In case you installed Debian mint and you want to activate both cores:
sudo cat /proc/cpuinfo
sudo aptitude install linux-image-686-pae linux-headers-686-pae


